How To Tag Another Page on your Facebook Page

Tagging is a great tool on Facebook – it’s a way of sharing the love, encouraging people to go and check out other pages relevant to yours. The pages you tag will also see that you’ve tagged them, and will hopefully respond in kind. It’s also rumoured that Facebook looks favourably upon pages that tag other pages. Obviously they change their mystical algorithms all the time, but it can’t hurt to try…

(Click any of the images to enlarge them)

So here’s how:

1. Navigate to your page (and remember I’m talking about your business/fan page here, NOT your profile):

Screenshot 2015-11-24 16.47.20

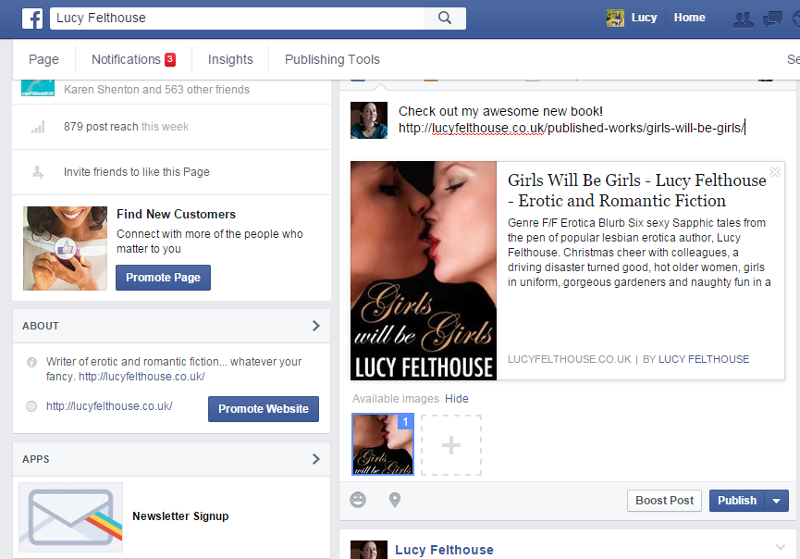
2. Start compiling your message, but stop writing just before where you want to tag another page:

Screenshot 2015-11-24 16.47.41

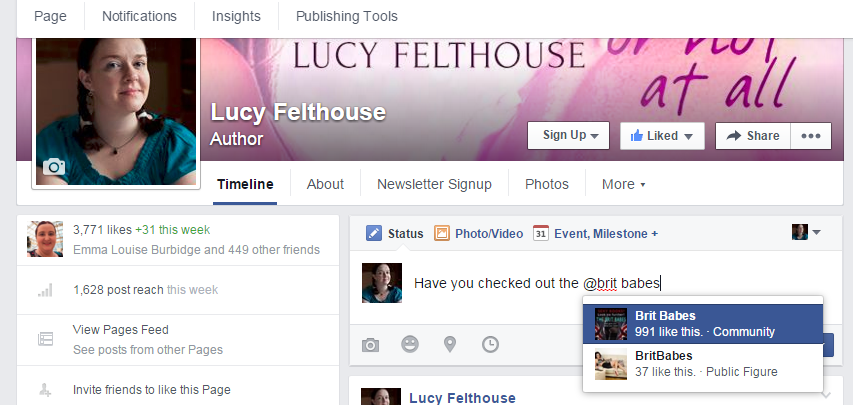
3. Input the @ symbol and start typing the name of the page you want to tag. Various options will start popping up as you type. Make sure you choose the correct one – as you can see, I’m given two options here as there are pages with similar names. Select the one you want and a link will be added to your message:

Screenshot 2015-11-24 16.47.50

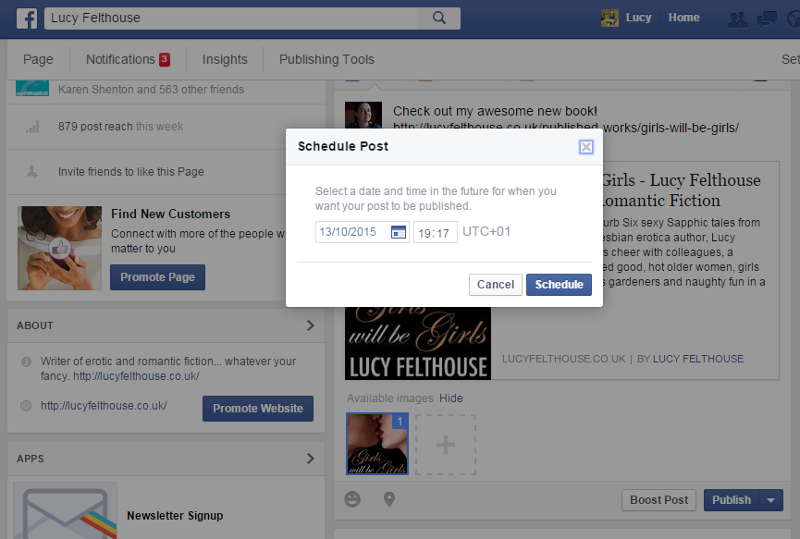
4. The link is added to the page you’ve selected. You can then continue writing your message. When you’re done, click ‘Publish.’

Screenshot 2015-11-24 16.48.06

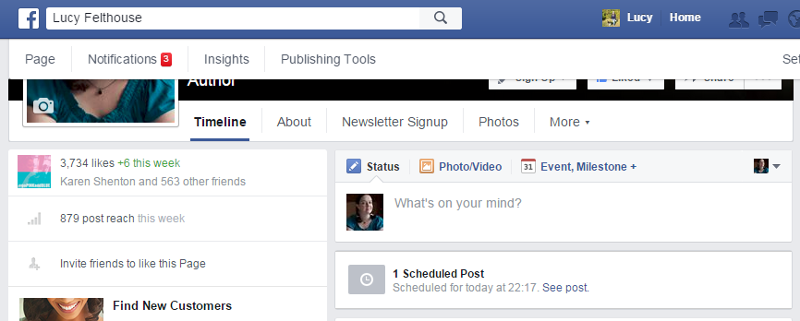
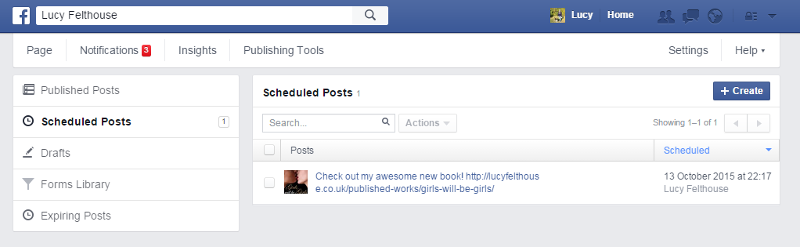
5. You’ll then end up with your message, with the other page tagged as a live link. Hover over it for more information on the page, and click through to test out your new-found page tagging skills!

Screenshot 2015-11-24 16.48.15

NOTE: It can sometimes be tricky to tag pages if they have an unusual name, or there are lots of other similar pages, and so on. A tip that sometimes helps is to go to the page you want to tag and look at their address in the search bar of your browser. It doesn’t always workbut if you input the name however you find it written in the search bar, that can help Facebook to find and tag the correct page. If a page hasn’t set their dedicated URL – for example http://www.facebook.com/lucyfelthousewriter and still has the default one, i.e. http://www.facebook.com/lotsofnumbersandgobbledegookhere it can make things seriously tricky. So avoid that on your own page, and make sure to set up your dedicated URL ASAP.

If you found this article useful, please consider sharing it with others. Thank you!

How to Schedule a Post on your Facebook Page

(Click any of the screenshots in this article to enlarge them)

NOTE: A Facebook page is different to your Facebook profile. This article applies only to pages. You can’t schedule on profiles.

1. Navigate to your page on Facebook.

Screenshot 2015-10-13 19.04.59

2. Compile your message as normal in the Status box.

Screenshot 2015-10-13 19.05.53

3. Click the little white down arrow next to the Publish button. Click Schedule.

Screenshot 2015-10-13 19.05.59

4. Select the date and time you want the post to go live. Click Schedule.

Screenshot 2015-10-13 19.06.09

5. And you’re done! Up until the time your scheduled post goes live, you’ll see a box towards the top of your page where you can access your scheduled posts.

Screenshot 2015-10-13 19.06.20

6. Click See Post to view all the posts you have scheduled. From here you can also edit or delete them if you wish.

Screenshot 2015-10-13 19.06.30

Happy Scheduling!

Lucy

What Is Thunderclap and Why Use It?

thunderclap

I’m sure some of you have seen messages and notes about Thunderclap floating around the web and wondered what it is. I know I’ve had several clients ask me about it, which is why I’m writing this post.

Basically, it is a free promotional tool (though there are paid options you can explore) to help you get the word out about something. For the purposes of this post, I’ll use books as an example, as it’s what I deal with.

You sign up for a free account at Thunderclap.it, and follow the simple instructions to set up your campaign. Use graphics from your book if you can, as that way you’re increasing visibility of your book to those that click through to support your campaign. Spend some time crafting your message, adding some relevant hashtags if you’ve got room – bear in mind that this message will go out once and hopefully to an awful lot of people, so you want it to have punch, something to really make people want to click on the link you’ve provided. I’d also recommend only opting for 100 supporters the first time around – it sounds like a small number, especially if you have lots of social media savvy friends, but it’s tougher than you think to get people to click that link.

Once you’re happy with what you’ve done, submit your campaign and wait for Thunderclap to approve it (you can speed this process up by paying, but I’ve never done this). Then, when approval arrives, the really hard work begins. You have to get supporters.

Supporters are the whole point of Thunderclap – they’re the ones that are signing up to send out your message on the date and time you’ve selected. I think, since Thunderclap is fairly new, that people may be shying away from supporting Thunderclaps as they don’t fully understand what it means. So, in a nutshell, here goes: supporters are pledging to help you, by donating a Tweet, a Facebook status or a Tumblr post (or indeed, any combination of those three). That’s all. They’ll see the message they’re pledging to send out, hit those support buttons, and, providing you get enough supporters to “tip” the campaign, their social media account/s will automatically send out the message on the date and time you’ve selected.

The point of all this? Well, since we’re talking books – it’s to drive sales. If you have an upcoming book, you can set something up in advance to go out on your release date – then you’ve got a while to promote the Thunderclap, get your supporters and then you’ll get a big boost on social media on the day, which will hopefully get people clicking those buy buttons and pushing you up the respective retailer charts. Cool, huh?

There is more to it than just getting the supporters, though. Sorry to complicate matters 🙂 Ideally you need supporters that Tweet/share/Tumble about books in your genre – so in turn their followers/friends/etc are more likely to be interested in your book. Also, it goes without saying that the more followers/friends/readers your supporters have, the more people are likely to see your message once it goes out. So if you can attract people with a large reach on social media, all the better.

But to keep things simple, maybe start out small, and once you’ve dipped your toe in the Thunderclap water and seen how it all works – you can be more adventurous next time.

Bottom line: make sure you’ve crafted a powerful message to go out, that will catch people’s eyes and make them want to click. Then sit back and (hopefully) watch your sales increase.

Want to see how it works from a supporter’s angle? Here are three Thunderclaps you can sign up for (and I’d be grateful of your help):

Timeless Desire – M/F erotic romance story

Little Boxes – contemporary romance novel

To Rome with Lust – erotic romance novel

I hope this has helped you. Feel free to share far and wide on the web, to help people gain an understanding of how it works. If I get lots of questions and queries, I may do another article at a later date with more specifics.

Happy Promoting!

Lucy

Increasing Reach on your Facebook Page

Here’s a handy tip for increasing reach on your Facebook page. “Reach” is Facebook’s word for how many people have seen your posts in their timelines. And I’m talking “fan” pages here, not profiles.

Normally, if you’re promoting book buy links, blog posts, etc, you’d type your message and the link into the box, then hit “post.” It’ll then go out and a percentage of the people that like your page will see it. To increase that number, give this a try:

Instead of posting the link in the same box as your text, try writing your text, then saying you’ll include the link in the comments. Post it, then post your link as a comment on that particular post. See screengrab:


Click to enlarge

Click to enlarge


I’ve tried this myself, and in the statistics of my page, it’s roughly tripling the number of people that see my posts. So it may take a few seconds more, but it’s worth it for that many more users to see what you’re posting.

I’m not 100% sure why Facebook do this, but I suspect it’s a) because they don’t want people linking out of Facebook, taking traffic away and b) because they want you to pay to use that “boost post” button. Can’t blame them for wanting to make sure cash out of page users, I suppose, but it’s pretty annoying as that’s the only way users are supposed to promote things, as opposed to on their personal profiles.

Give it a try. I hope it helps!

Using Twitterfeed to Promote Blog Posts

Do you spend ages Tweeting, Facebooking in LinkedIn-ing (think I just made up a new word there) your blog posts? Perhaps you contribute to several other blogs, as well as your own, and all that social networking takes up too much time. Time you could be using to plot, write or edit your next book!

Never fear, Twitterfeed is here. In a few simple steps, you can be letting Twitterfeed do all the hard work for you.

1. Go to Twitterfeed.com and sign up for an account.

2. Add your first feed by clicking ‘create new feed.’

3. Add the feed name and the URL, then click ‘test rss feed’ to make sure it works.

4. Click ‘advanced settings.’ Check each of the settings to make sure they’re what you want. The most useful I found, particularly if you contribute to a group blog, is ‘post prefix.’ That way you can add text to show that it’s from a blog you contribute to, but not necessarily your post. For example, I prefix with ‘From BlogName.’

5. Continue to step two. You now have three available services; Twitter, Facebook and LinkedIn. Follow the steps to add the Twitter account you’d like to feed the blog posts to. Then repeat the same steps for Facebook and LinkedIn. Pay particular attention to the Facebook settings, as you have the option to post to your regular wall, or you can post to a page, instead.

6. When you’ve selected all the services you want to post to, click ‘All Done!’ and you’ll receive confirmation that your feed is set up and ready to post automatically.

7. Click to go to your dashboard, and you’ll see the feed you just set up, ready and raring to go. Simply repeat from number 2 on this post to add more feeds.

And there you have it! Effort free blog post promotion for yourself and your fellow bloggers!

Completed Project Update

Here are a couple of small projects I’ve undertaken in the past week or two:

Writer Kay Jaybee asked me to build her a Facebook Fan page, to promote the work she already has out, and also in preparation for upcoming releases. You can get more information on the Portfolio page, or visit the page directly by going here.

K D Grace, also a writer, requested a Facebook Fan page too. Her reasoning was the same as Kay’s, to be able to communicate directly with her readers and keep them updated on current and upcoming releases. Again, more information is available on the Portfolio page, or you can see K D’s page here.

K D also wanted personalisation of her Twitter feed, in order to closely match the look and feel of her website. You can see the results on her Twitter page, here.